Control program flow in JavaScript
A program can run through different paths depending on certain conditions (e.g. whether a user is logged in or not). There are so-called control structures that can be used to determine whether a statement block should be executed and how often a use case should be executed. Whether a statement block is to be executed can be controlled via so-called conditional statements. How often this is executed can be controlled with so-called loops or repeats.
1. Conditional statements
Often, a certain instruction within a program should only be executed if a certain condition is met. Such conditional statements can be formulated in programming with the if statements.
The keyword if introduces the if statement, the condition is formulated within the following round brackets () and the statement or instructions that are to be executed if the condition is true or fulfilled are formulated within the curly brackets.
const condition;
if(condition) {
 // Program code to be executed if condition is fulfilled
}
The following example displays a message depending on whether a user is logged in when the if statements are used. The content of the if statement (within the ()) is only executed if the variable userIsLoggedIn is the value true:
Complete Code - Examples/Part_37/main.js...
const userIsLoggedIn = true;
if(userIsLoggedIn) {
 const message = 'Welcome, ' + userName;
 document.getElementById('message').textContent = message;
}
The variable userIsLoggedIn does not necessarily have to contain a Boolean value. If it contains a different value, the if statement checks whether this value evaluates to a true.
The variable document is an object that represents the loaded web page. The function getElementById(), which is provided by this object, can be used to access an HTML element on this web page using its ID. This function then returns a corresponding object that represents this HTML element and whose textContent property can then be used to change the text content of this element.
It is also possible to omit the curly brackets {} in case the conditional statement only contains a single statement. However, this is not advisable as it can become confusing:
const condition;
if(condition)
 // Program code to be executed if condition is fulfilled
2. Define branches
With a branch, the code takes one of two paths, either one path if the condition is fulfilled or the other if the condition is not fulfilled. The if statement is also used to define a branch, but this is supplemented by a further program branch. This additional program branch is introduced with the keyword else:
 const condition;
 if(condition) {
   // Program code to be executed if condition is fulfilled
 } else {
   // Program code to be executed if condition is not fulfilled
 }
The previous example Part_37 could be extended as follows:
Complete Code - Examples/Part_38/main.js...
 const userIsLoggedIn = true;
 if(userIsLoggedIn) {
   const message = 'Welcome, ' + userName;
   document.getElementById('message').textContent = message;
 } else {
   displayLoginForm();
 }
A welcome message is also displayed here if the user is logged in userIsLoggedIn = true. If the user is not logged in userIsLoggedIn = false, the function displayLoginForm() is called here.
Test multiple conditions
It is also possible to test more than two conditions. The if-else-if-else branch is required to be able to take several program branches. This starts again with the if statement and the condition that is to be checked first. Additional conditions can then be added using the else if statements. A further program branch can be added that is to be executed if none of the previous conditions are met, namely the else statement:
Complete Code - Examples/Part_39/main.js...
 if(condition1) {
  // Program branch that is executed if condition 1 is fulfilled
 } else if(condition2) {
  // Program branch that is executed if condition 2 is fulfilled
 } else {
  // Program branch that is executed if none of the previous ...
  // ... conditions is fulfilled
 }
The number of else if statements is unlimited:
Complete Code - Examples/Part_40/main.js...
 if(condition1) {
   // program branch that is executed if condition 1 is fulfilled
 } else if(condition2) {
   // program branch that is executed if condition 2 is fulfilled
 } else if(condition3) {
   // program branch that is executed if condition 3 is fulfilled
 } else if(condition4) {
   // program branch that is executed if condition 4 is fulfilled
 } else {
   // Program branch that is executed if none of the previous ...
   // ... conditions is fulfilled
 }
It would also be possible to realize this with several individual consecutive conditional statements, but this is the better variant.
The closing else statement can also be omitted:
 if(condition1) {
   // Program branch 1
 } else if(condition2) {
   // Program branch 2
 }
The next example shows movie tips for specific age groups. The prompt() method first asks for the age for which the movie tip is to be displayed. The first condition then checks whether the age entered is greater than or equal to 18 (age >= 18). If this is the case, a message Show movies with AU6, AU12, AU16 and AU18. is displayed. If the age is less than 18, it is first tested whether the age is greater than or equal to 16 (age >= 16), then whether it is greater than or equal to 12 (age >= 12) and finally whether it is greater than or equal to 6 (age >= 6):
Complete Code - Examples/Part_41/main.js...
 const age = prompt('What age are you looking for movie tips?');
 if(age >= 18) {
   console.log('Show movies with AU6, AU12, AU16 and AU18.');
 } else if(age >= 16) {
   console.log('Show movies with AU6, AU12 and AU16.');
 } else if(age >= 12) {
   console.log('Show movies with AU6 and AU12.');
 } else if(age >= 6) {
    console.log('Show movies with AU6.');
 }
If you change the sequence, the program no longer behaves as originally intended:
Complete Code - Examples/Part_42/main.js...
 const age = prompt('What age are you looking for movie tips?');
 if(age >= 6) {
   console.log('Show movies with AU6.');
 } else if(age >= 12) {
   console.log('Show movies with AU6 and AU12.');
 } else if(age >= 16) {
   console.log('Show movies with AU6, AU12 and AU16.');
 } else if(age >= 18) {
   console.log('Show movies with AU6, AU12, AU16 and AU18.');
 }
The output for the value 17 is now Show movies with AU6. Although the conditions were only checked in reverse order, this "error" occurs. The reason for this is that if the value 17 is entered as the age, the first condition already applies (age >= 6) and Show movies with AU6. is output. The other conditions are not even checked as the first condition already applies.
As a rule, you can remember that the more specific conditions should always be queried first and the general conditions last. In the example, the condition age >= 18 is more specific than age >= 16. And age >= 16 is more specific than age >= 12.
More complex conditions
With the various Boolean operators, such as the AND operator, OR operator or the negation operator, it is possible to formulate even more complex conditions (more information about the different operators here: The different operators in JavaScript):
Complete Code - Examples/Part_43/main.js...
 const userIsLoggedIn = true;
 const userIsAdmin = false;
 if(userIsLoggedIn && userIsAdmin) {
   /* ... */
 }
The expression userIsLoggedIn && userIsAdmin is used here as a condition for the if statement, i.e. the corresponding program branch in the curly brackets is only executed if the AND link of the two variables userIsLoggedIn and userIsAdmin is a true.
Nesting of branches
The more complex a program becomes, the more different conditions and program branches are tested. If a check is added to the example beforehand to ensure that the value entered is a number. Only if this is the case should you continue working with the entered value:
Complete Code - Examples/Part_44/main.js...
 const age = prompt('What age are you looking for movie tips?');
 if(!isNaN(parseFloat(age)) && isFinite(age)) {
   if(age >= 18) {
     console.log('Show movies with AU6, AU12, AU16 and AU18.');
   } else if(age >= 16) {
     console.log('Show movies with AU6, AU12 and AU16.');
   } else if(age >= 12) {
     console.log('Show movies with AU6 and AU12.');
   } else if(age >= 6) {
     console.log('Show movies with AU6.');
   }
 } else {
   console.error('Invalid age entered.');
 }
Here, the condition (!isNaN(parseFloat(age)) && isFinite(age)) is checked first. The part of the program in which the specific value of the age is checked is only executed if this condition is fulfilled. If the condition is not fulfilled, the error message Invalid age entered. is displayed.
3. Use selection operator
In programming, it is often the case that you want to assign one value or another to variables, depending on the condition. For example, if you want to find out whether a user is at least 18 years old, if the age is greater than or equal to 18, the variable receives the value true, otherwise the value false:
Complete Code - Examples/Part_45/main.js...
 const age = prompt('Please enter your age.');
 let isAtLeast18;
 if(age >= 18) {
   isAtLeast18 = true;
 } else {
   isAtLeast18 = false;
 }
 console.log(isAtLeast18);
If you give the variable an initial value directly at the beginning, the else part can also be omitted:
 const age = prompt('Geben Sie bitte Ihr Alter ein.');
 let isAtLeast18 = false;
 if(age >= 18) {
   isAtLeast18 = true;
 }
 console.log(isAtLeast18);
This makes the code a little shorter, but it is possible to keep it even shorter with the selection operator. The structure of the operator is as follows:
const variable = condition ? value1 : value2;
First of all, this is just an ordinary assignment. The variable name is set on the left-hand side of the =. On the right-hand side is the expression with the selection operator. This is a tenary operator because it has three operands:
- The first operand is the condition to be checked, followed by a question mark ?.
- The second operand is the value to be assigned to the variable if the condition is met.
- The third operand is the value to be assigned if the condition is not met. The values of the second operand and the third operand are separated by a colon :.
The previous example, but now with the selection operator:
 const age = prompt('Please enter your age.');
 const isAtLeast18 = age >= 18 ? true : false;
 console.log(isAtLeast18);
The value to be assigned to the variable can be any value, for example a character string:
Complete Code - Examples/Part_46/main.js...
 const age = prompt('Please enter your age.');
 const isAtLeast18 = age >= 18 ? true : false;
 const message = isAtLeast18 ? 'Over 18' : 'Under 18';
 console.log(message);
Conditional statements and branches are used to take one of several paths depending on one or more conditions and to execute the statements contained therein. The selection operator, on the other hand, is used to assign one of two values to a variable depending on a single condition. It should also be noted that the selection operator is not nested and is not used in any code blocks, as this leads to very complex and unreadable expressions.
4. Define multiple assignments
For conditional statements and branches that are executed by several program branches, there is another alternative besides the if else if else statements, which is the better choice in some application cases. This is the so-called multiple branch or switch branch (because of the keyword switch). This switch branch is comparable to the if else if else branch, but this switch variant is particularly suitable for the fact that a variable to be checked can take several values, somewhat clearer in the notation:
 switch(expression) {
   case value1:
   // Instructions
     break;
   case value2:
   // Instructions
     break;
   case value3:
   // Instructions
     break;
   case value4:
   // Instructions
     break;
   default:
   // Instructions
 }
A switch statement is introduced with the keyword switch. The round brackets are followed by an expression expression, the value of which is used to control one of several subsequent program branches. The individual program branches are in turn defined using the keyword case. The value that is written after such a case (value1, value2, value3, value4) is compared with the expression expression. If the values match, the corresponding program branch is initiated, i.e. the instructions are executed that follow the respective case, the value and the colon that follows it. Within a program branch, the keyword break can also be used to ensure that the entire switch statement is jumped out of and thus the respective program branch is aborted. As a rule, a break is set at the end of each case program branch. To intercept cases that are not intercepted by the case statements, the keyword default is used (comparable to else). If none of the previously defined case statements apply, the statements are executed in the default program branch.
Example:
A web application in which test results are to be displayed. Depending on the test result, different icons should be displayed. Faulty tests, for example, should use an icon called error.png and successful tests should use pass.png.
| Test result | Meaning | Icon |
|---|---|---|
| 0 | Passed | pass.png |
| 1 | Info message | info.png |
| 2 | Warning | warning.png |
| 3 | Failed | error.png |
| 4 | unknown | unknown.png |
| 5 | unknown | unknown.png |
| -1 | unknown | unknown.png |
The test result is coded within the application using the values 0 - 3. If you test the test results within an if else if else branch, i.e. "If the test result has the value 0, load icon pass.png, if the test result has the value 1, load icon info.png:
Complete Code - Examples/Part_47/main.js...
const testResultElement = document.getElementById('testResult');
const testResult = 0;           // test result, would normally be calculated
let icon = null;                // Variable that will contain the icon name
if(testResult === 0) {          // Check the test result. If this has the value 0,
  icon = 'pass.png';            // the icon name "pass.png" is used.
} else if(testResult === 1) {   // If the test result has the value 1,
  icon = 'info.png';            // the icon name "info.png" is used.
} else if(testResult === 2) {   // If the test result has the value 2,
  icon = 'warning.png';         // the icon name "warning.png" is used.
} else if(testResult === 3) {   // If the test result has the value 3,
  icon = 'error.png';           // the icon name "error.png" is used.
} else {                        // For all other values
  icon = 'unknown.png';         // the icon name "unknown.png" is used.
}
testResultElement.src = 'img/' + icon;  // Set the respective icon
This program can also be used with a "switch" branch. The variable testResult, which contains the test result, is used as input for the switch test. The default statement is executed if the variable has none of these values:
Complete Code - Examples/Part_48/main.js...
 const testResultElement = document.getElementById('testResult');
 const testResult = 0;       // test result, would normally be calculated
 let icon = null;            // Variable that will contain the icon name
 switch(testResult) {        // Check the test result
   case 0:                   // If this has the value 0,
    icon = 'pass.png';       // the icon name "pass.png" is used.
    break;                   // Abort the switch statement
   case 1:                   // If the test result has the value 1,
    icon = 'info.png';       // the icon name "info.png" is used.
    break;                   // Abort the switch statement
   case 2:                   // If the test result has the value 2,
    icon = 'warning.png';    // the icon name "warning.png" is used.
    break;                   // Abort the switch statement
   case 3:                   // If the test result has the value 3,
    icon = 'error.png';      // the icon name "error.png" is used.
    break;                   // Abort the switch statement
   default:                  // For all other values
    icon = 'unknown.png';    // the icon name "unknown.png" is used.
 }
 testResultElement.src = 'img/' + icon;
switch cancel instructions
The reason why a break is usually written at the end of a case program branch is that the break keyword prevents the statement of the following case expressions from being executed. Omitting the break ensures that all statements defined from a matching case expression onwards are executed. With reference to the previous example, if testResult has the value 2, the variable icon first receives the value warning.png, but then the statement of case 3 is also executed, followed by the default statement, which means that icon would always receive the value unknown.png.
Complete Code - Examples/Part_49/main.js...
 const testResultElement = document.getElementById('testResult');
 const testResult = 0;       // test result, would normally be calculated
 let icon = null;            // Variable that will contain the icon name
 switch(testResult) {        // Check the test result
   case 0:                   // If this has the value 0,
     icon = 'pass.png';      // the icon name "pass.png" is assigned,
  // but not canceled.
   case 1:                   // If the test result has the value 1,
     icon = 'info.png';      // the icon name "info.png" is assigned,
  // but not canceled.
   case 2:                   // If the test result has the value 2,
     icon = 'warning.png';   // the icon name "warning.png" is assigned,
  // but not canceled.
   case 3:                   // If the test result has the value 3,
     icon = 'error.png';     // the icon name "error.png" is assigned,
  // but not canceled.
   default:                  // For all other values (and all cases above)
     icon = 'unknown.png';   // the icon name "unknown.png" is used.
 }
 testResultElement.src = 'img/' + icon;
This behavior would not be desired in the example, but you can make use of this behavior and combine different case statements. If you want to use the same icons for case 0 and case 1 as well as for case 2 and case 3, the code can be reformulated:
Complete Code - Examples/Part_50/main.js...
 const testResultElement = document.getElementById('testResult');
 const testResult = 0;       // test result, would normally be calculated
 let icon = null;            // Variable that will contain the icon name
 switch(testResult) {        // Check the test result
   case 0:                   // If this has the value 0
   case 1:                   // or the value 1,
     icon = 'pass.png';      // the icon name "pass.png" is used.
     break;                  // abort
   case 2:                   // If the test result has the value 2
   case 3:                   // or the value 3,
     icon = 'error.png';     // the icon name "error.png" is used.
     break;                  // abort
   default:                  // For all other values
     icon = 'unknown.png';   // the icon name "unknown.png" is used.
 }
 testResultElement.src = 'img/' + icon;
Assigned value for various variable assignments:
| Value of testResult | Assigned value of icon |
|---|---|
| 0 | pass.png |
| 1 | pass.png |
| 2 | error.png |
| 3 | error.png |
| 4 | unknown.png |
| 5 | unknown.png |
| -1 | unknown.png |
Multiple branches and Booleans
If you want to take one of several paths in the program depending on Boolean conditions, you should use conditional statements or branches. Multiple branching via the switch statement, on the other hand, is generally not suitable for testing Boolean conditions.
Here is a negative example of this: Complete Code - Examples/Part_51/main.js...
5. Define counting loops
So-called loops are used in programming to execute an instruction repeatedly. There are three different types of such loops:
- the counter loop, the code is executed repeatedly on the basis of a counter variable
- the head-controlled loop and the foot-controlled loop, are executed until a certain condition is met
Structure of a counting loop
Counting loops are well suited if you know in advance how often certain instructions will be repeated. Counting loops are introduced by the keyword for, which is why they are often referred to as for loops. Within the following pair of brackets () you define the:
- Initialization: this is where the code that is to be executed once before the entire loop is executed goes, usually the counter variable is initialized here
- Condition: this is the code that checks whether the loop should be executed further or not before executing each loop iteration, usually checking whether the counter variable has already reached a certain limit
- Increment expression: this is where the code that is to be executed after each loop iteration is executed goes, usually the counter variable is incremented here
Initialization, condition and increment expression are separated by a semicolon ; so that the JavaScript interpreter can recognize which code belongs where. The actual code that is to be executed multiple times is noted in the curly bracket {}, the so-called loop body.
 for (
   initialization;        // is executed before the loop is executed
   condition;             // is checked before executing an iteration
   Increment expression   // is executed at the end of an iteration
 ) {
   Loop body              // is executed once in each iteration
 }
With regard to the sequence, the following happens here: At the beginning of the loop, the initialization instruction is executed once. The condition is then checked. If this is true, the loop body is executed and then the increment expression is executed. The loop then continues with checking the condition, executing the loop body and incrementing the expression until the condition is no longer fulfilled. If this is the case, i.e. the condition is false, the loop execution is terminated.
Example:
Complete Code - Examples/Part_52/main.js...
 for (
   let i = 1;        // Initialization: is executed before the loop is executed
   i <= 10;          // Condition: is checked before executing an iteration
   i++               // Increment expression: is executed at the end of an iteration
  // executed
 ) {                 // Loop body: is executed once in each iteration
   console.log(i);
 }
 // And here again in everyday notation:
 for (let i = 1; i <= 10; i++) {
   console.log(i);
 }
The example shows the output of numbers from 1 to 10. At the beginning, the counter variable i is set to the initial value 1. This instruction is only executed once before the entire loop is executed. The condition is then defined via 1 <= 10. The loop is executed as long as the counter variable i is less than or equal to 10. As long as the counter variable has the value 1-10, the condition is fulfilled. This means that the loop body is executed, the value of i is output and then the variable i is incremented by one in the increment expression. This continues until the expression i <= 10 is no longer fulfilled, i.e. the variable has the value 11.
The variable name i is not particularly meaningful, but in the context of loops, i has become established for the counter variable and is used quite frequently. i is the abbreviation for index.
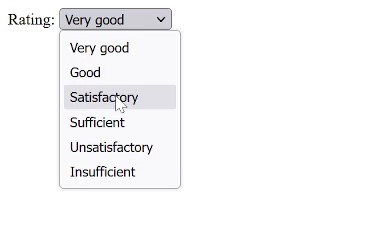
The next example is more practical, where values are generated in a selection list. For example, filling a selection list on a website with values from an array using JavaScript. With a counter loop, this is relatively simple by iterating over the values in the array (iteration: in programming, the repeated execution of instructions) and adding an entry to the selection list for each value.
Complete Code - Examples/Part_53/main.js...
 const selectElement = document.getElementById('grade');     // the selection list
 const options = [                                           // a list with values
   'Very good',
   'Good',
   'Satisfactory',
   'Sufficient',
   'Unsatisfactory',
   'Insufficient'
 ];
 for(let i=0; i<options.length; i++) {                       // For each value in
                                                             // of the list
   const optionElement = document.createElement('option');   // create a
                                                             // selection element,
   const optionText = document.createTextNode(options[i]);   // create the
                                                             // corresponding text,
   optionElement.appendChild(optionText);                    // append the text
                                                             // the element
   selectElement.appendChild(optionElement);                 // and append the element
                                                             // to the selection list.
 }
First, the selection list within the web page is accessed via document.getElementById('grade');. Then the array options was defined with the selection values, which were immediately inserted into this selection list. The counting loop then begins. The variable i is again used as a counter variable. This time it was initialized with 0 in order to access the values of the array. The loop body was then executed once for each element in the array. This is ensured by the expression i < options.length. A lot happens within the loop body, but this is not important at this point. The only important thing here is that the respective value in the array at index i is accessed via options[1]. The code around it then ensures that a corresponding entry is inserted into the selection list.
Nested counting loops
It is also possible to execute other loops within a loop body. This construction is called nested loops.
Example:
Complete Code - Examples/Part_54/main.js...
 // outer loop
 for (let i = 1; i < 11; i++) {
   // inner loop
   for (let j = 1; j < 11; j++) {
     console.log(`i has the value "${i}", j has the value "${j}"`);
   }
 }

 // output:
 // i has the value "1", j has the value "1"
 // i has the value "1", j has the value "2"
 // i has the value "1", j has the value "3"
 ...
This code outputs all number combinations between 1 and 10. In the first iteration of the outer loop, i has the value 1. In this iteration, the inner loop is then executed completely, i.e. the variable j has the values 1 to 10 one after the other, the value of i remains unchanged. After the inner loop has ended, the execution of the inner loop begins again. This is repeated until the condition for the outer loop is no longer fulfilled, i.e. the variable has the value 11.
A more practical example is to output the data of a multidimensional array, for example an array of coordinates. Each coordinate is represented as an array of two values. The first value is the latitude, the second the longitude output. The outer loop now iterates over the coordinates array coordinates. In each iteration of this loop, the variable coordinate is assigned the current element of this array (coordinates[i]), which is also an array. The inner loop is now used to iterate over this array and output the corresponding latitude and longitude information.
Complete Code - Examples/Part_55/main.js...
 const coordinates = [
   [40.79, 7.92],
   [33.27, 12.98],
   [44.39, 13.82],
   [61.56, 7.97],
   [67.30, 5.67],
   [77.66, 7.34],
   [52.69, 12.45],
   [82.79, 11.33]
 ];
 for(let i=0; i<coordinates.length; i++) {
   const coordinate = coordinates[i];
   for(let j=0; j<coordinate.length; j++) {
     console.log(coordinate[j]);
   }
 }
 // output:
 // 40.79
 // 7.92
 // 33.27
 // 12.98
 // 44.39
 // 13.82
 // 61.56
 // 7.97
 // 67.3
 // 5.67
 // 77.66
 // 7.34
 // 52.69
 // 12.45
 // 82.79
 // 11.33
If you use a new counter variable for each loop in nested loops, you can prevent the individual loops from getting in each other's way. The use of the names i, j, k, l etc. has become established as a convention.
In principle, loops can be nested any number of times, i.e. nested loops can contain loops again, and these loops can also contain loops and so on. However, more than three nesting levels are rather unusual in practice, as the code quickly becomes confusing.
6. Defining head-controlled loops
The difference between the two loops lies in the point in time at which the Boolean check takes place. In the head-controlled loop, the while loop, the first thing that is checked is whether the Boolean condition is fulfilled. If this is the case, the code in the curly brackets (the loop body) is executed. If the condition is not fulfilled, it is not executed or is no longer executed. The execution of the program is then continued after the loop.
 while (expression) {
   // statement(s)
 }
In contrast to the for loop, which consists of an initialization expression, the condition and the increment expression, the while loop only contains one expression, which is used to define the condition. If you want to emulate a counting loop with a while loop and, for example, output the numbers from 1 to 10, the initialization expression must be written before the loop and the incrementation expression must be placed within the loop body:
Complete Code - Examples/Part_56/main.js...
 let i = 1;          // Initialization
 while (i < 11) {    // condition
   console.log(i);   // statement
   i++;              // Incrementation
 }
As a rule, while loops are not used for such counter-oriented tasks. The next example is more practice-oriented, where HTML elements are moved within a web page:
Complete Code - Examples/Part_57/script.js...
 document.addEventListener('DOMContentLoaded', () => {
   const sourceList = document.getElementById('source');         // the source list
   const targetList = document.getElementById('target');         // the target list
   const copyButton = document.getElementById('move');           // the button to
   // move
   copyButton.addEventListener('click', function() {             // When clicking on the
   // button:
     while(sourceList.hasChildNodes()) {                         // As long as there are still entries
   // are still in the source list,
       const item = sourceList.removeChild(                      // the first entry
         sourceList.firstChild);                                 // is removed from this list
       targetList.appendChild(item);                             // and added to the target list
   // added to the target list.
     }
   });
 });
On this web page, the list entries are moved from the source list (index.html: id="source") to the target list (index.html: id="target") by a header click. In the JavaScript code, only the while loop is important for now. The call of the function hasChildNodes() from the sourceList object is used here as a condition for the while loop. As long as the source list still has entries, the first entry is removed from the list and moved to the target list. If there are no more entries in the source list, sourceList.hasChildNodes() returns the value false and the loop is aborted.


7. Define foot-controlled loops
The foot-controlled loop works in principle like the head-controlled loop, but in the opposite way. This means that before the Boolean condition is checked, the loop body is already executed once. The loop is introduced with the keyword do, followed by curly braces, in which the loop body is located. The closing curly bracket is followed by the keyword while. The foot-controlled loop is also known as a do-while loop:
 do {
  // statement(s)
 } while (expression)
Just like the header-controlled loop, the footer-controlled loop does not contain an initialization expression or an incrementation expression. To use the do-while loop to output the numbers 1 to 10, both must be added manually before the loop or in the loop body:
Complete Code - Examples/Part_58/main.js...
 let i = 1;          // initialization
 do {
   console.log(i);   // statement
   i++;              // incrementation
 } while (i < 11)    // condition

 // output: 1 2 3 4 5 6 7 8 9 10
while loop vs. do-while loop
A while loop is executed 0 to n times and a do-while loop is executed 1 to n times. In practice, the while loop is used more frequently, as it ensures that the loop body is only executed when the corresponding condition is met. The do-while loop should generally only be used if the loop body is executed at least once. Just like counting loops (for), head-controlled (while) and foot-controlled (do-while) loops can also be nested. Each of these loop types can also be used in all other loop types.
8. Aborting loops and loop iterations prematurely
For counting loops, header-controlled and footer-controlled loops, the conditions that must be met for the loop body to be executed are specified in the loop definition and indirectly determine when the loop should be terminated. However, there are two other ways of influencing the execution of loops from the loop body: This can be done either with the keyword break, which allows the complete loop to be aborted directly. Or with the keyword continue, which allows you to cancel the current loop iteration and continue with the next loop iteration.
Cancel loops prematurely
Sometimes you want to abort a loop prematurely. For example, the individual numbers of a number array should be output, but only until the first odd number has been found. Then the loop is to be aborted, for this you need the keyword break, which ensures that the loop is specifically aborted:
Complete Code - Examples/Part_59/main.js...
 const numbers = [2, 4, 42, 26, 7, 2, 58, 68, 19];
 console.log('Before the loop.');
 for (let i = 0; i < numbers.length; i++) { // Iterate over ...
   const number = numbers[i]; // ... the number array.
   if (number % 2 === 1) { // If a number is odd ...
     console.log('Odd number found.'); // ... output message ...
     break; // ... and abort the loop.
   } // Otherwise ...
   console.log(number); // ... output the number.
 }
 console.log('After the loop.');
 // output:
 // Before the loop.
 // 2
 // 4
 // 42
 // 26
 // Odd number found.
 // After the loop.
The array numbers contains even and odd numbers, and the number 7 is the first odd number in the array. After initializing this array, the individual numbers are output via a counting loop. The modulo operator % is used to check whether the respective number is an odd number number % 2 === 1. If this is the case, the message Odd number found is output and the loop is aborted.
Premature termination is not only possible with counting loops, but also with head-controlled and foot-controlled loops. Here is another example with a head-controlled loop:
Complete Code - Examples/Part_60/main.js...
 const numbers = [2, 4, 42, 26, 7, 2, 58, 68, 19];
 console.log('Before the loop.');
 let i = 0;                              // Initialize counter variable.
 while(i < numbers.length) {          // Iterate over ...
   const number = numbers[i];            // ... the number array.
   if (number % 2 === 1) {               // If a number is odd ...
     console.log('Odd number found.');   // ... output message ...
     break;                              // ... and abort the loop.
   } // Otherwise ...
   console.log(number);                  // ... output the number ...
   i++;                                  // ... and increment the counter variable.
 }
 console.log('After the loop.');
Cancel loop iteration prematurely
If you do not want to abort the entire loop, but only the current loop iteration, use the keyword continue:
Complete Code - Examples/Part_61/main.js...
 const numbers = [2, 4, 42, 26, 7, 2, 58, 68, 19];
 console.log('Before the loop.');
 for (let i = 0; i < numbers.length; i++) {          // Iterate over ...
   const number = numbers[i];                        // ... the number array.
   if (number % 2 === 1) {                           // If a number is odd ...
     console.log('Odd number found.');               // ... output message ...
     continue;                                       // ... and abort the loop iteration.
   }
   // Otherwise ...
   console.log(number);                              // ... output the number.
 }
 console.log('After the loop.');
 // output:
 // Before the loop.
 // 2
 // 4
 // 42
 // 26
 // Odd number found.
 // 2
 // 58
 // 68
 // Odd number found.
 // After the loop.
In this example, the odd numbers are skipped, i.e. after finding the first odd number in the array, the loop is not aborted, but jumps to the next number in the array. As soon as the first odd number is found, the message Odd number found. is displayed. However, the keyword continue then ensures that the rest of the loop body for this iteration is no longer executed, i.e. the last statement, the output of the number, is skipped. Instead, the next loop iteration is continued, i.e. the increment expression is executed, the condition of the loop i < number.length is checked and the loop body is executed again. This means that only even numbers are output and odd numbers are ignored.
Infinite loops
Care must be taken when using continue, because incorrectly positioned continue can lead to an infinite loop, i.e. a loop that no longer breaks off and this can lead to considerable problems when executing the application!
The next example shows an infinite loop, please do not execute it, in the worst case the browser will no longer respond!
 const numbers = [2, 4, 42, 26, 7, 2, 58, 68, 19];
 console.log('Before the loop.');
 let i = 0;                             // Initialize counter variable.
 while(i < numbers.length) {         // Iterate over ...
   const number = numbers[i];           // ... the number array.
   if (number % 2 === 1) {              // If a number is odd ...
     console.log('Odd number found.');  // ... output message ...
     continue;                          // ... and abort the loop iteration.
   }
   // Otherwise ...
   console.log(number);                 // ... output the number and ...
   i++;                                 // ... increment the counter variable.
 }
The problem here is that the loop iteration is aborted by the continue before the counter variable i is incremented. As a result, the loop condition i < numbers.length never results in false and the loop body is executed again and again for the same i.
This problem can be solved by incrementing the counter variable before using continue, most simply at the beginning of the loop body:
Complete Code - Examples/Part_62/main.js...
 const numbers = [2, 4, 42, 26, 7, 2, 58, 68, 19];
 console.log('Before the loop.');
 let i = -1;                                 // initialize counter variable
 while(i < numbers.length) {                 // Iterate over the number array.
   i++;                                      // Increase the counter variable.
   const number = numbers[i];                // Assign the respective number.
   if (number % 2 === 1) {                   // If a number is odd ...
     console.log('Odd number found.');       // ... output message ...
     continue;                               // ... and cancel the loop iteration abort.
   } // Otherwise ...
   console.log(number);                      // ... output the number.
 }
This problem can be solved by incrementing the counter variable before using continue, preferably directly at the beginning of the loop body. However, to ensure that the counter variable does not immediately have the value 1 when the array is first accessed (which would skip the first number in the array), it must be initialized with the value -1:
To prevent an infinite loop, it must always be ensured that the termination condition of the respective loop also results in a false at some point.
Define labels
continue makes it possible to end the current loop iteration within a loop and continue with the next loop iteration. For nested loops, the loop iteration of the loop in which continue is also used is always ended. If the continue occurs in the outer loop, the loop iteration of the outer loop is terminated; if it occurs in the inner loop, the loop iteration of the inner loop is terminated. However, it is also possible to end the loop iteration of the outer loop from an inner loop using so-called labels.
For example, the number array is to be searched for duplicate numbers and, as soon as a duplicate number is found, the next number is moved on to. To implement this, you can use a nested counting loop to compare each number in the array with all subsequent numbers:
Complete Code - Examples/Part_63/main.js...
 const numbers = [2, 4, 42, 26, 7, 2, 58, 68, 19];
 for (let i = 0; i < numbers.length; i++) {
   const number = numbers[i];
   for (let j = i + 1; j < numbers.length; j++) {
     const number2 = numbers[j];
     console.log(`Compare ${number} with ${number2}`);
     if (number === number2) {
       console.log('Same numbers found');
       continue;
     }
   }
 }

 // output:
 // Compare 2 with 4
 // Compare 2 with 42
 // Compare 2 with 26
 // Compare 2 with 7
 // Compare 2 with 2
 // Same numbers found
 // Compare 2 with 58
 ...
Here the implementation was carried out without labels. The problem with this implementation is that it does not work as desired. Although it correctly outputs the same numbers, it performs more comparisons than necessary. The reason for this is that 'continue' aborts the loop iteration of the inner loop after finding a duplicate number, but the inner loop is still executed to the end.
To solve this problem, you need the labels, which allow you to mark individual instructions within a program with a name and "jump" directly to this named instruction via contiune and break:
Complete Code - Examples/Part_64/main.js...
 const numbers = [2, 4, 42, 26, 7, 2, 58, 68, 19];
 outerLoop:
   for (let i = 0; i < numbers.length; i++) {
     const number = numbers[i];
     innerLoop:
       for (let j = i + 1; j < numbers.length; j++) {
         const number2 = numbers[j];
         console.log(`Compare ${number} with ${number2}`);
         if (number === number2) {
           console.log('Same numbers found');
           continue outerLoop;
         }
       }
 }

 // output:
 // Compare 2 with 4
 // Compare 2 with 42
 // Compare 2 with 26
 // Compare 2 with 7
 // Compare 2 with 2
 // Same numbers found
 // Compare 4 with 42
 ...
Both loops are each marked with a label here. The outer loop with the name outerLoop, the inner loop with the name innerLoop. The continue outerLoop instruction then ensures that the program jumps from the inner loop to the outer loop and continues with the next loop iteration of this outer loop.
The following example shows the same code again only with break. The break outerloop instruction ensures that the program jumps from the inner loop to the outer loop and then aborts the entire loop:
Complete Code - Examples/Part_65/main.js...
 const numbers = [2, 4, 42, 26, 7, 2, 58, 68, 19];
 outerLoop:
   for (let i = 0; i < numbers.length; i++) {
     const number = numbers[i];
     innerLoop:
       for (let j = i + 1; j < numbers.length; j++) {
         const number2 = numbers[j];
         console.log(`Compare ${number} with ${number2}`);
         if (number === number2) {
           console.log('Same numbers found');
           break outerLoop;
         }
       }
   }

 // output:
 // Compare 2 with 4
 // Compare 2 with 42
 // Compare 2 with 26
 // Compare 2 with 7
 // Compare 2 with 2
 // Same numbers found
In practice, labels are rarely used because they often result in the source text no longer being easy to read.
Related links: